While my Hydrosnap grow tower kits are an epic scalable solution to growing tons of food, I needed something a bit smaller to set up in my kitchen, so welcome to the world of small scale herb gardening! My first foray with hydroponics was this dead simple kratky method on my apartment counter. The basil was delicious, but the look of algae stained mason jars were not a vibe. I wasn’t about to put the jars in some old socks like alot of DIY’ers suggest lol. As usual, after a few days being stuck in the CAD / printing rabbithole, I emerged with these kratky mason jar covers. Now I can effortlessly grow fresh herbs on my countertop in style. Let’s dive into how you can get started, whether you’re using my covers, or some old socks haha.
Intro to Kratky Hydroponics
What is Kratky?
The Kratky method is a passive form of hydroponics that requires no pumps or electricity. It’s a set-and-forget system perfect for beginners. By suspending plants above a reservoir of nutrient-rich water, roots have easy access to both nutrients and oxygen. While traditional systems might offer greater efficiency, for a few herbs in the kitchen, this method is more than adequate.
Blocking Light is Key
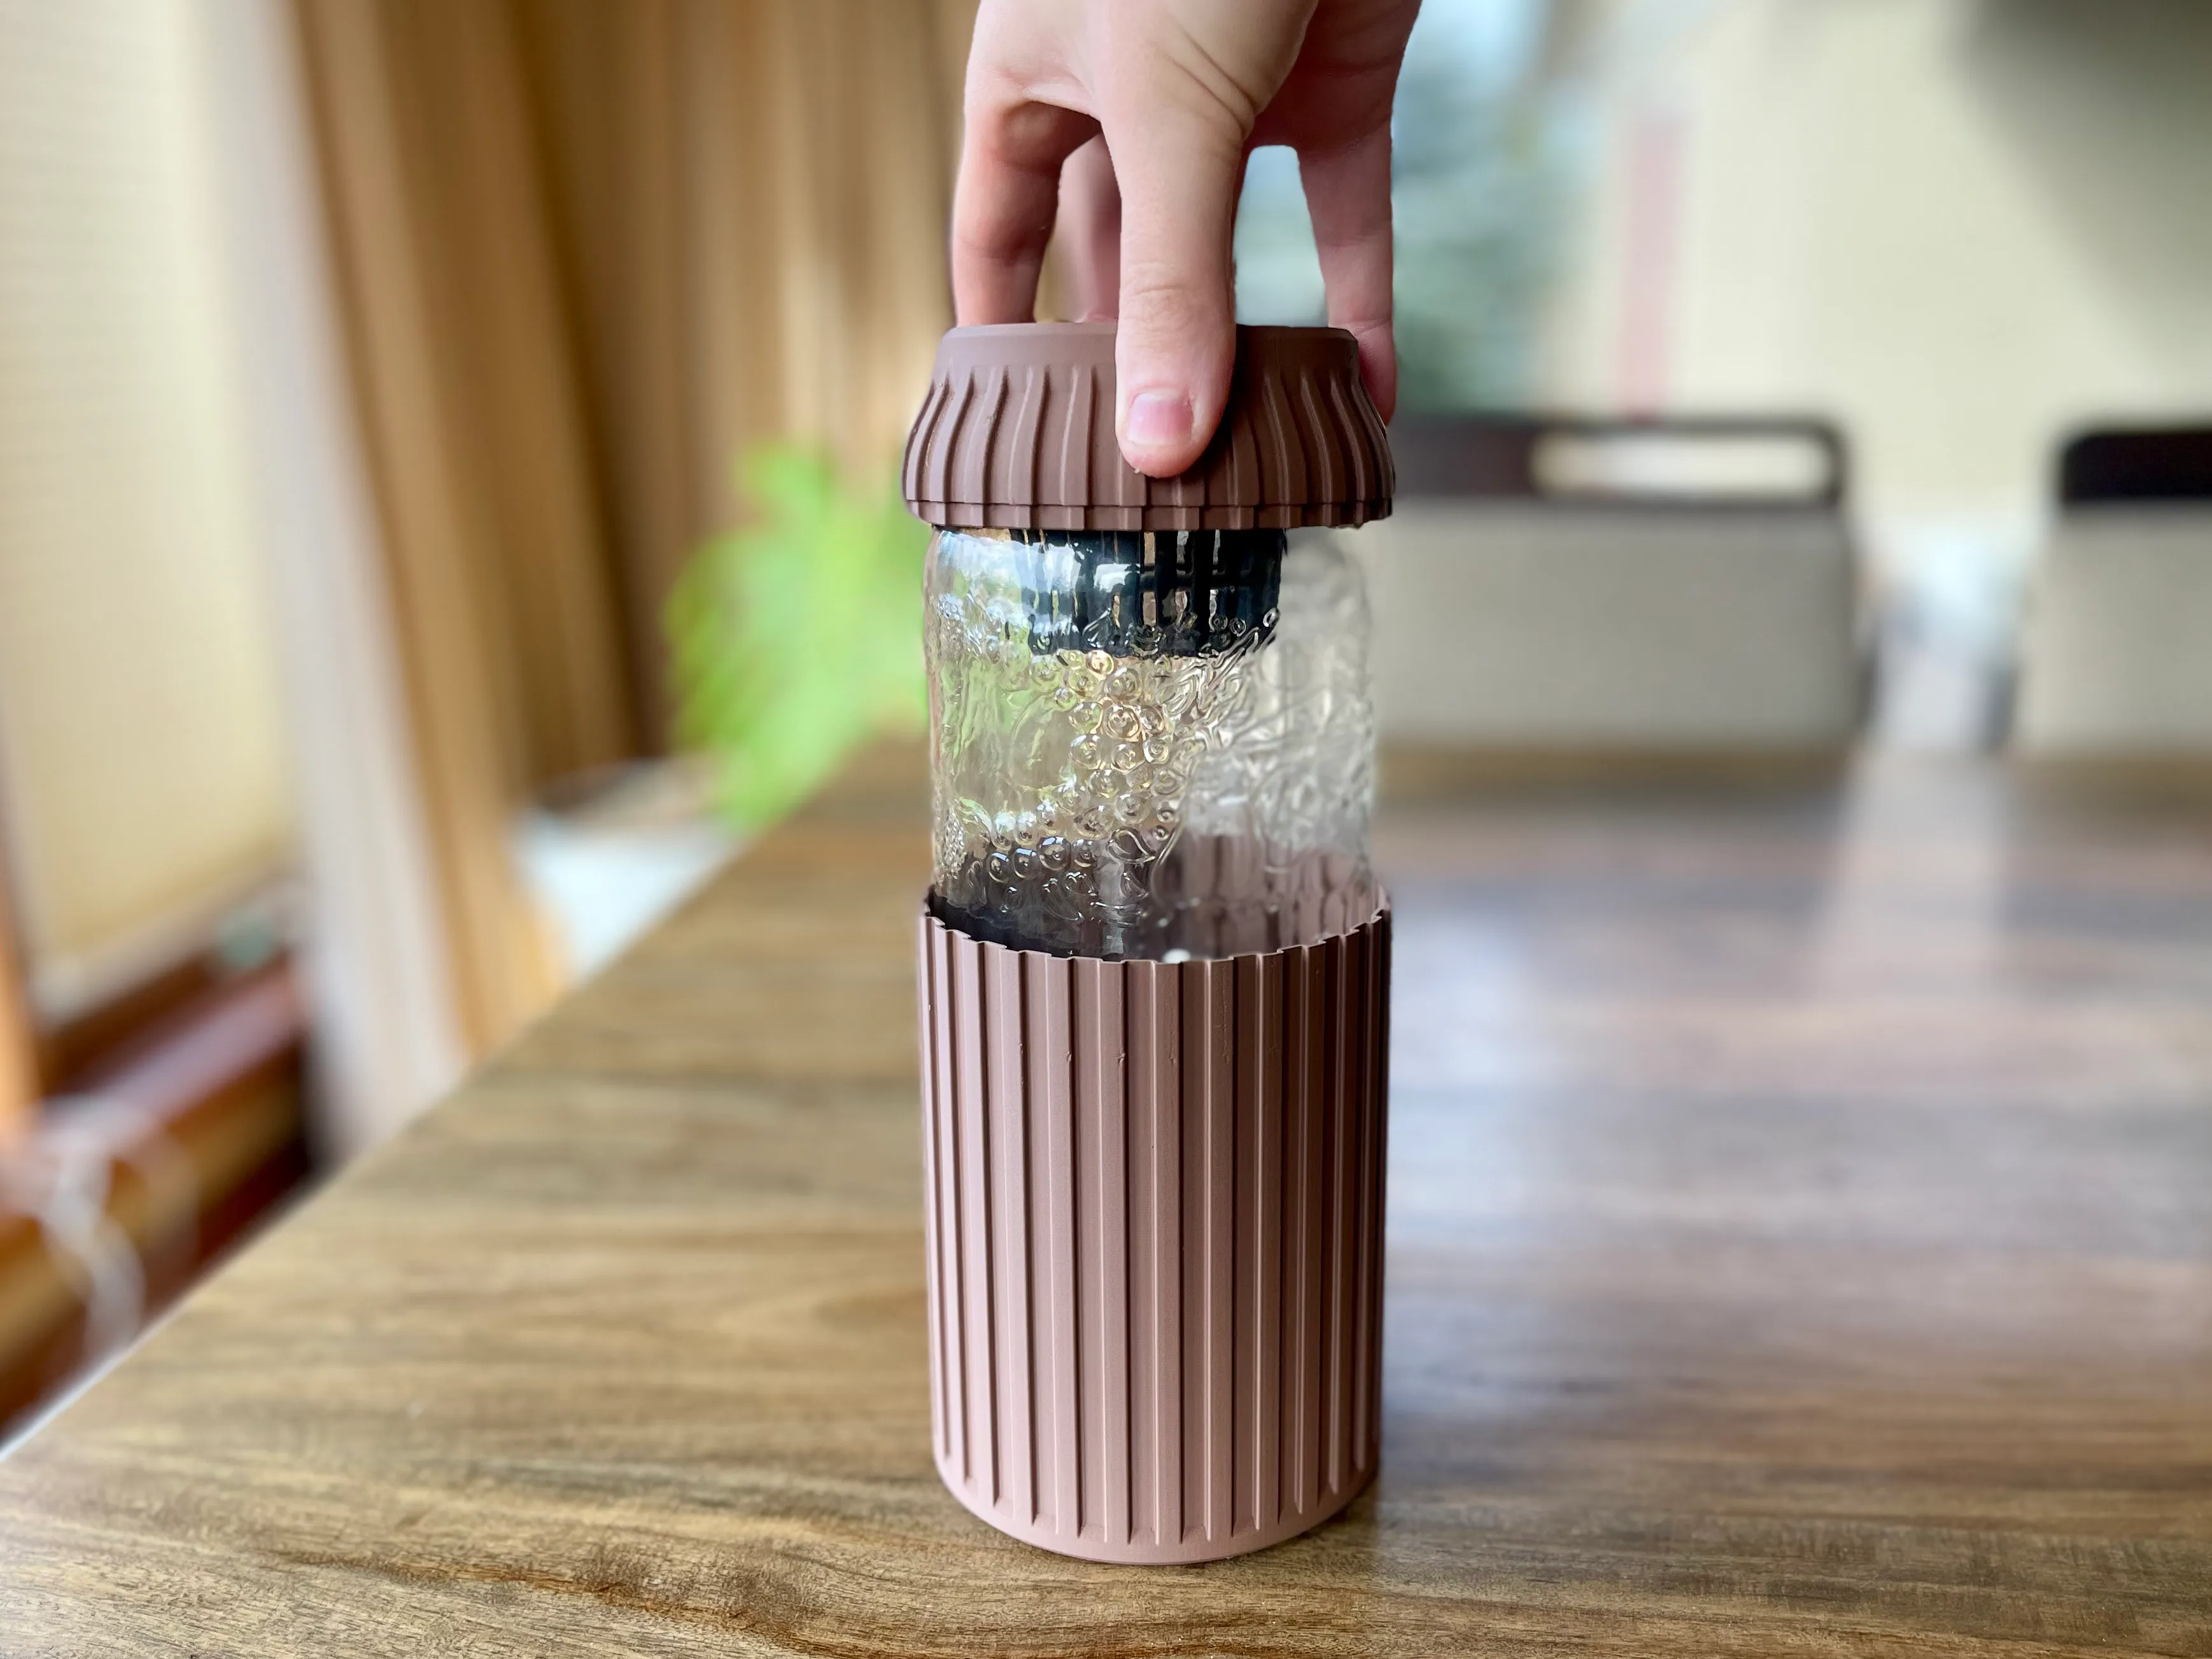
Preventing light from entering the reservoir is crucial to avoid algae growth. Algae isnt the end of the world, but it steals oxygen and nutrients meant for your plants. Many kratky methods include spray painting jars or wrapping them in tinfoil, but that isn’t the prettiest solution. That’s why I designed these stylish covers that block light while adding +3 aura to your kitchen.
Nutrient Solutions
Like all hydroponics, we need to provide nutrients since there’s no soil. One popular option is the General Hydroponics Flora Series, a 3-part kit ideal for adjusting nutrient ratios. However, for herbs and leafy greens, the General Hydroponics FloraNova Grow is a much simpler solution—just dilute with water per the instructions.
Grow Media
You need to support the plant in the net pot. I prefer rockwool cubes for their water retention, aiding in the rooting process of cuttings. You can find these at most garden centers. LECA (Lightweight Expanded Clay Aggregate) is another option offering excellent drainage and reusability, available at garden centers and even IKEA!
Getting Started
Plant Prep: Soak a rockwool cube in water, and place a plant cutting into the rockwool. While seeds are an option, I use cuttings to speed things up
Wait for Roots: Roots typically appear within a week. Keep the cubes moist, storing cuttings in a covered container in a cool space.
Planting Time: Once roots extend from the cube, place them in your 32oz wide-mouth mason jar, insert the net pot, and screw the cover in place.
Add Nutrients: Mix your nutrient solution and fill the jar until it touches the bottom of the net pot.
Load your Plant: Place the plant with grow media into the net pot and insert the jar into the lower portion of the cover.
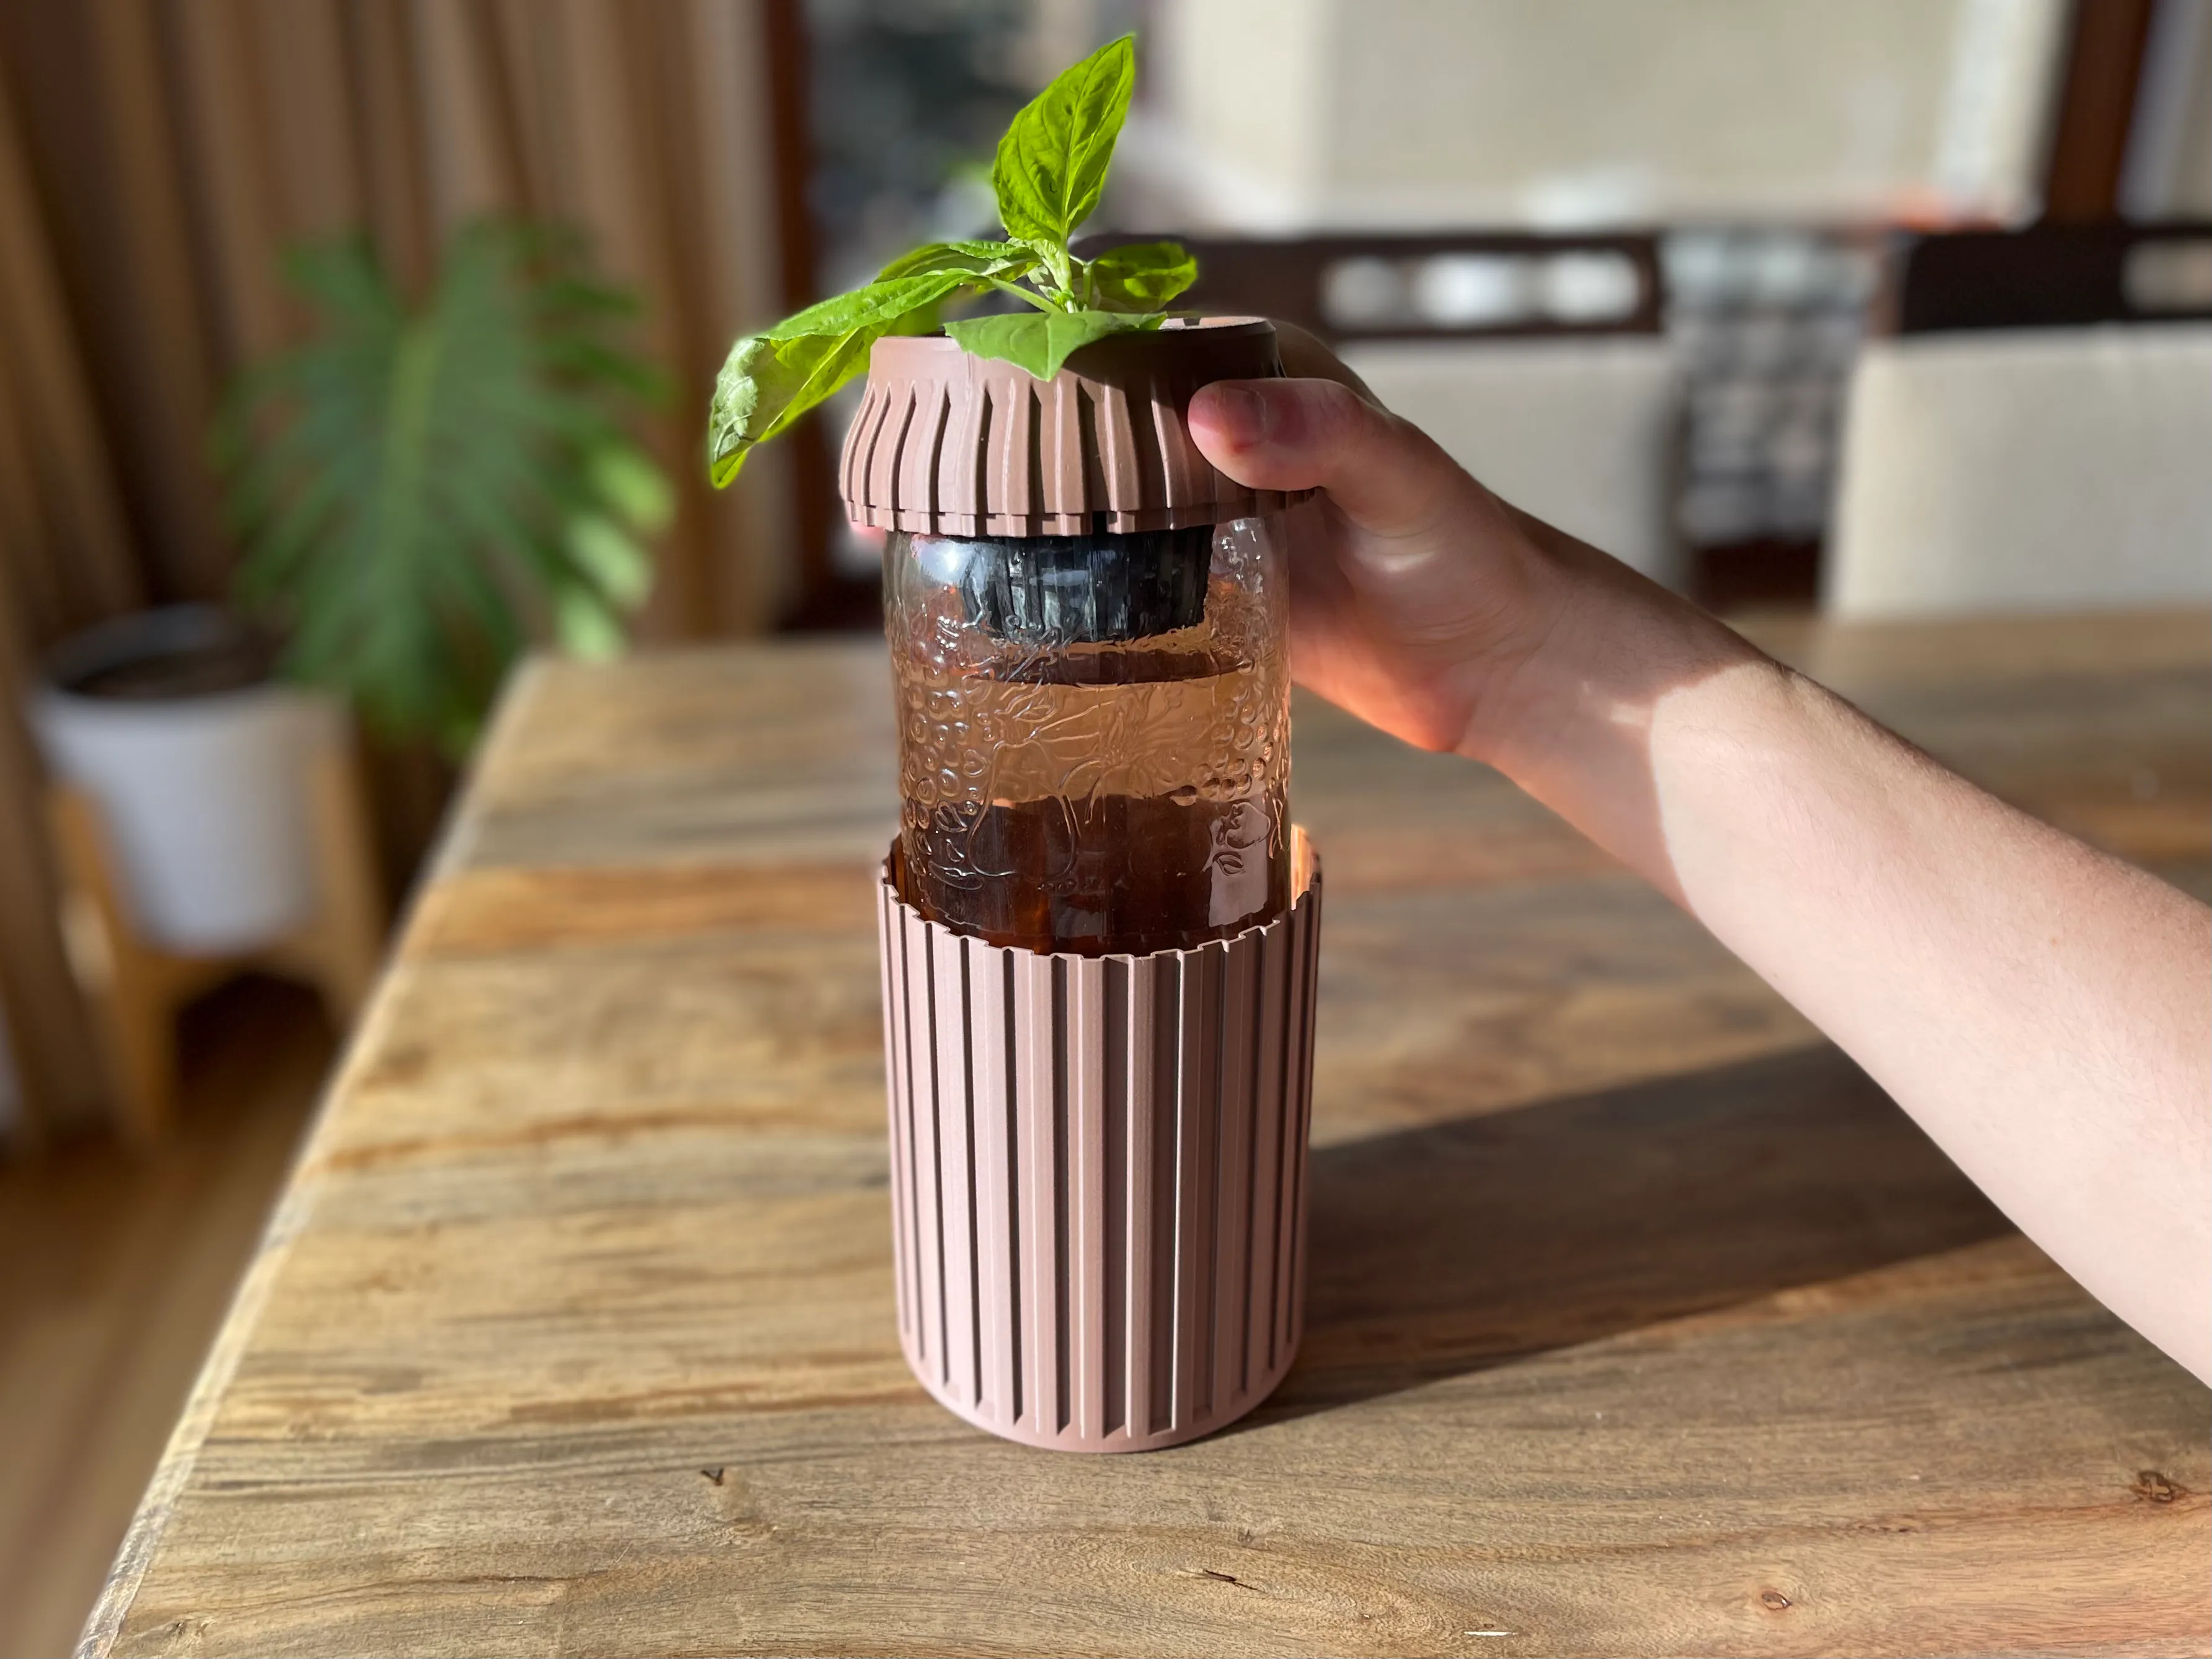
Growing Time: Position the jar in sunlight and watch it grow. Keep an eye on nutrient levels, ensuring only a portion of the roots are submerged to allow oxygen intake. The nutrients should last the life of the plant, so just add water from here out.
Share Some Pics
Now that you’re growing some food, I’d love to see your new herb garden! Tag me in your pics on social media @mfgnerd. If you have any questions about hydroponics or just wanna chat, give me a shout.
If you want to grow kratky in style, pick up a cover on my Shop!
