After experimenting with various DIY hydroponic towers, I couldn’t find a solution I really liked. A fully 3D-printed tower proved too costly and time-consuming, while designs requiring slitting and heat-forming PVC pipes were super labor-intensive and I didn’t like the idea of growing food in burnt PVC.
In my usual fashion I nerd sniped myself into designing a solution that performed how I wanted. After many concepts and iterations, I had designed the HydroSnap Net Pot Inserts, which snap into standard PVC pipes. This single component grew into a full DIY tower ecosystem, offering a scalable, universal solution for both home and commercial use.
In this guide, I’ll show you how to set up a HydroSnap hydroponic tower in a basic configuration. Whether you’re building a single tower in a bucket or a field of towers, the process is the same. Let’s start creating your own vertical garden!
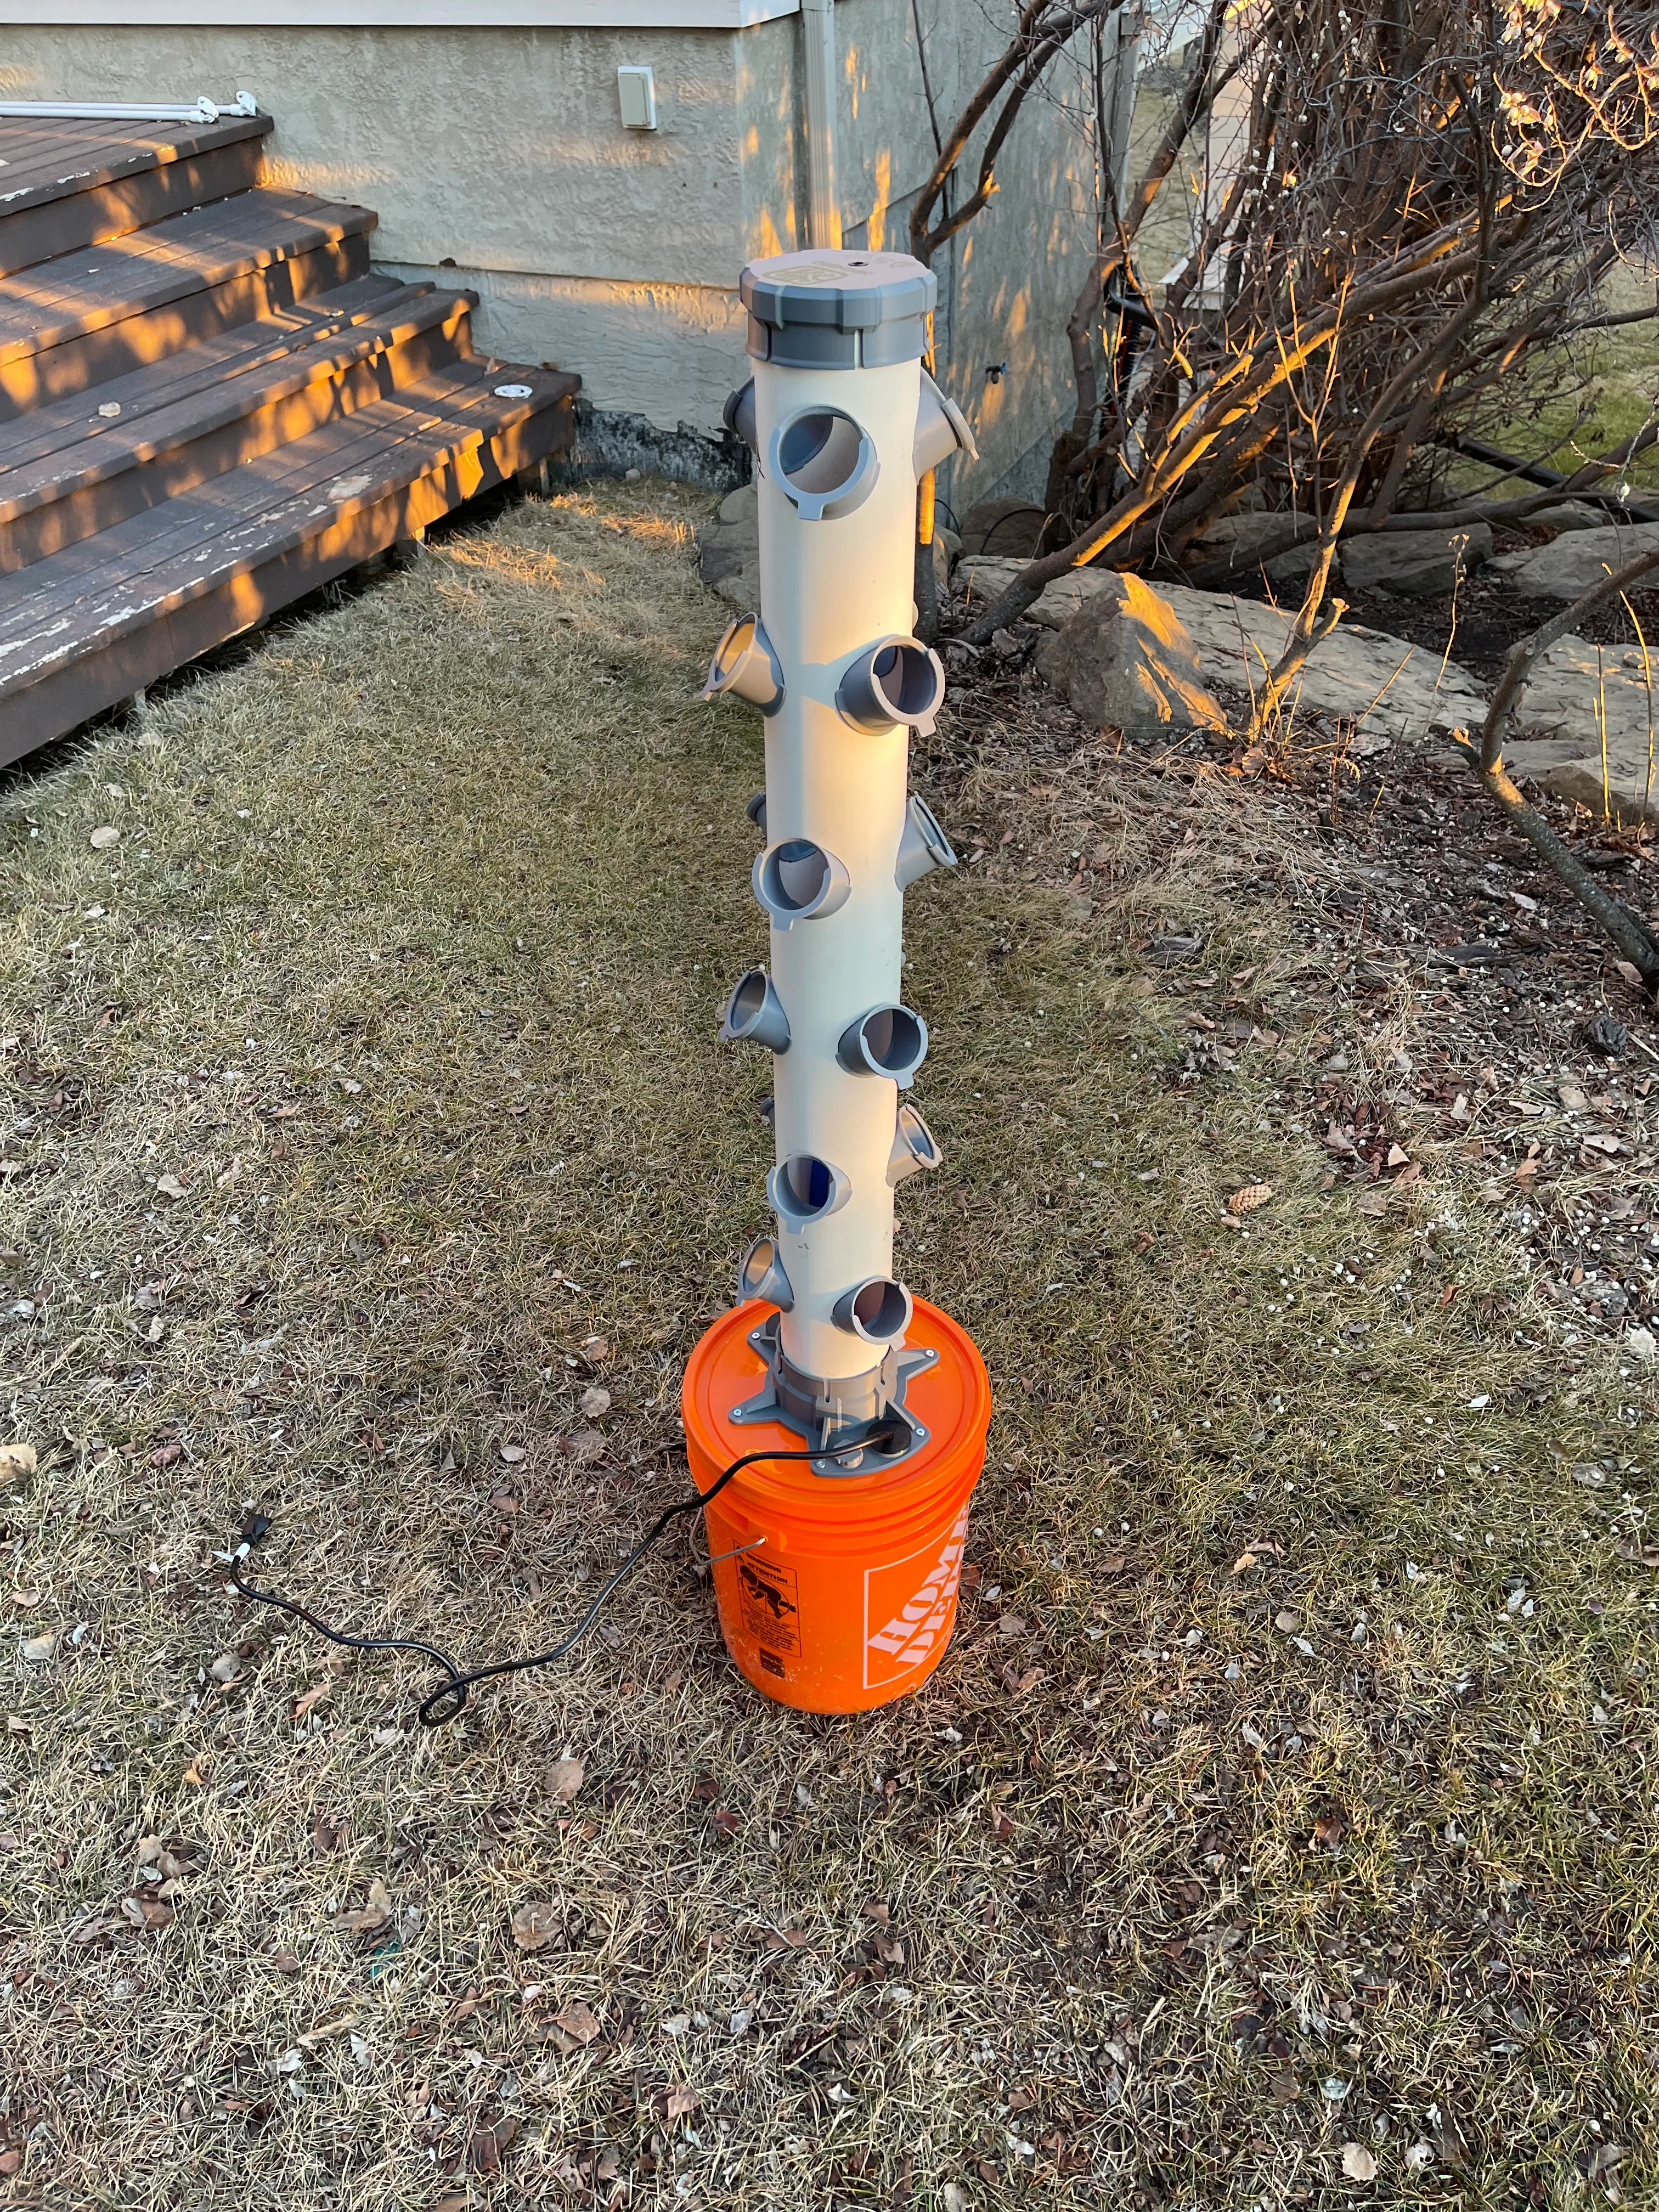
Table of contents
Open Table of contents
Planning
Decide how tall you want your tower, and your grow site spacing. I recommend buying a 10’ length of pvc pipe and cutting it into thirds. If your pipe has a flared end you will need to cut this off first. This should leave you with 3 equal sections at ~40”. For the spacing, I’d suggest 3 sites per level, staggering each level with 6” of vertical spacing. This will let you fit 18 inserts on your 40” pipe.
If you’re going to build a tower over 4 feet, make sure your reservoir is stable and the lid is sturdy, switching to a plywood lid is a good move. You’ll also need to secure the top of the tower to something sturdy.
Materials
Check Out the Full HydroSnap Tower Kit on My Shop
- HydroSnap Cap
- HydroSnap Base
- HydroSnap Inserts
- 4” PVC Pipe
- Reservoir
- 2” Netpots
- Pump
- Hose with matching clamps and 1/4” NPT hose barb
- Base mounting screws
Tools
- 2.5” Holesaw
- Drill
- Jigsaw
- Multi-tool or hand saw.
- Utility knife
- Tape measure & marker
- PPE
Preparing the pipe
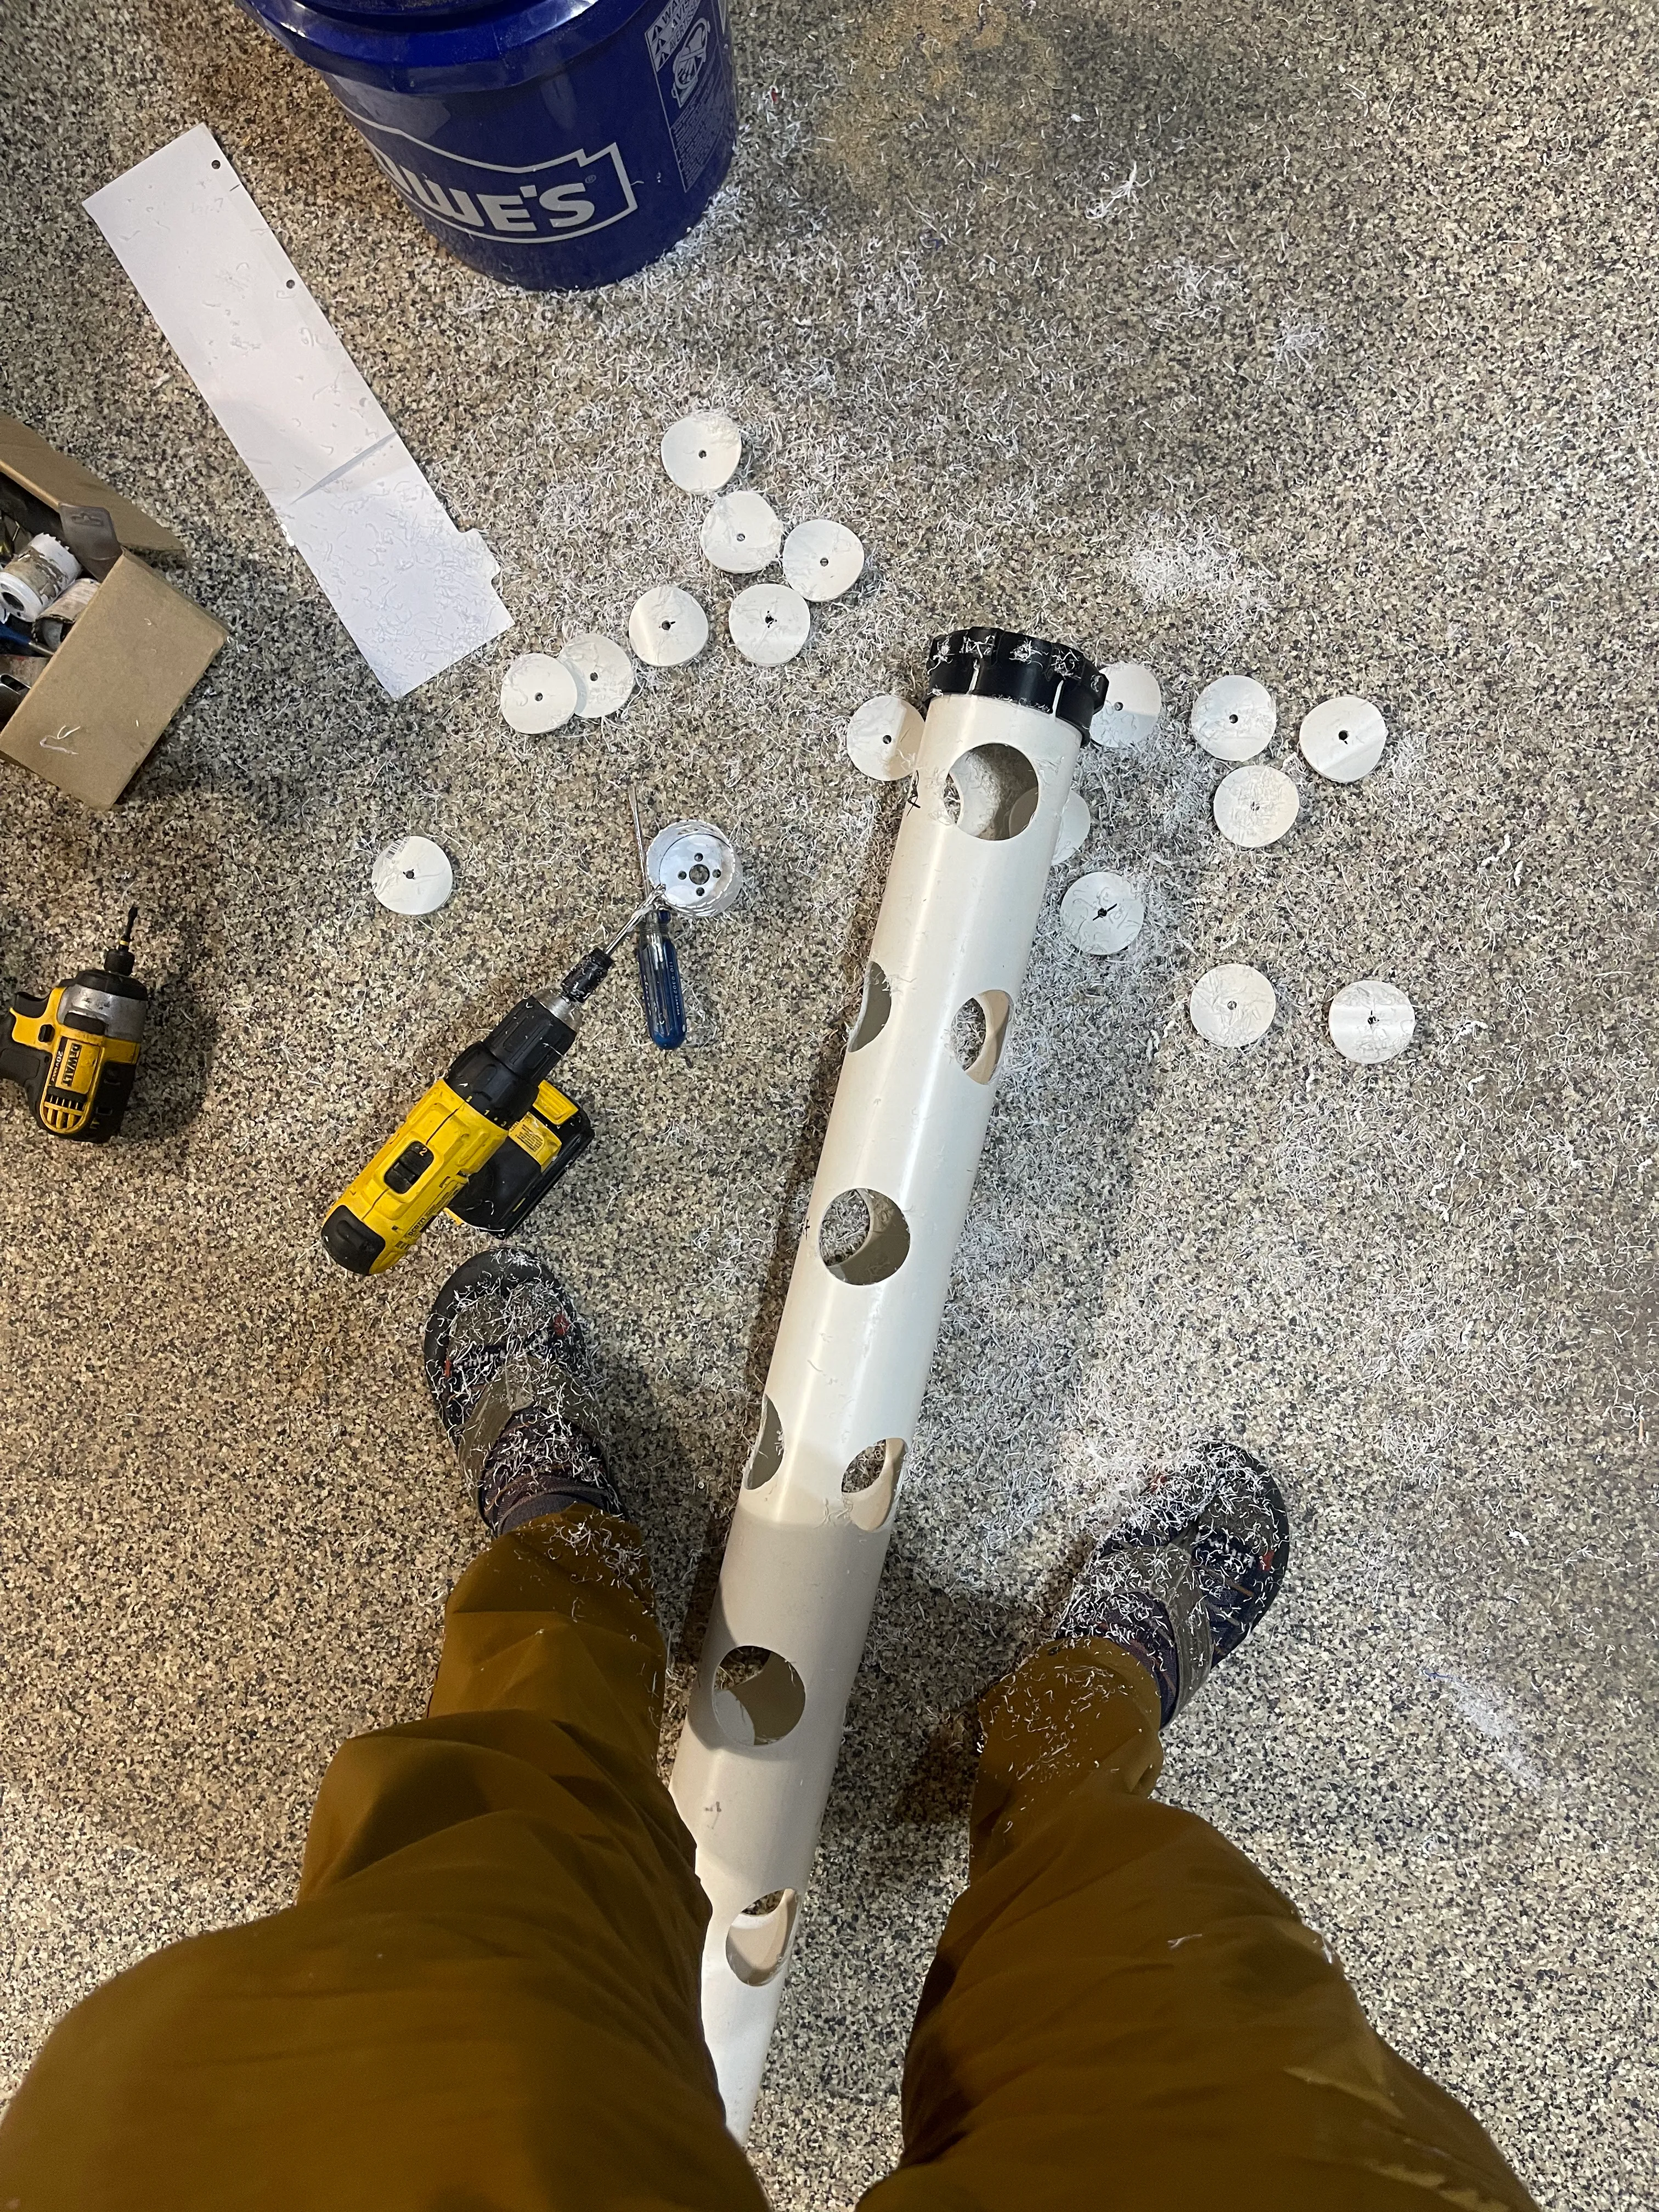
- Cut your pipe to length, an oscillating multi tool works great, but a hand saw or hacksaw will work too.
- Make the first mark 4” from the top of the pipe, to leave space for the cap. Then, mark every 6” down the pipe in a straight line. Make sure the last level is at least 4.25” from the bottom of the pipe to leave space for the base.
- To space grow sites evenly around the pipe, wrap a piece of paper around the pipe and mark the overlap. Divide the paper into three equal parts. For the first row, transfer these marks onto the pipe at the first level mark.
- For each subsequent level, rotate the paper template by half of one section to stagger the levels. Repeat this process for each 6” mark down the pipe.
- Using a 2.5” holesaw, drill out all of the grow sites. You may find it easier to drill a pilot hole on each grow site first before using the holesaw. Make sure you do this on a solid surface that is easy to clean up. You don’t want to be vacuuming plastic chips out of your garden, or your wool socks for that matter lol.
- The holesaws can leave a bit of a sharp edge on the pipe. This isn’t a problem for the inserts, but it’s a bit dangerous, so use a deburring tool, file, or sandpaper to knock this edge down.
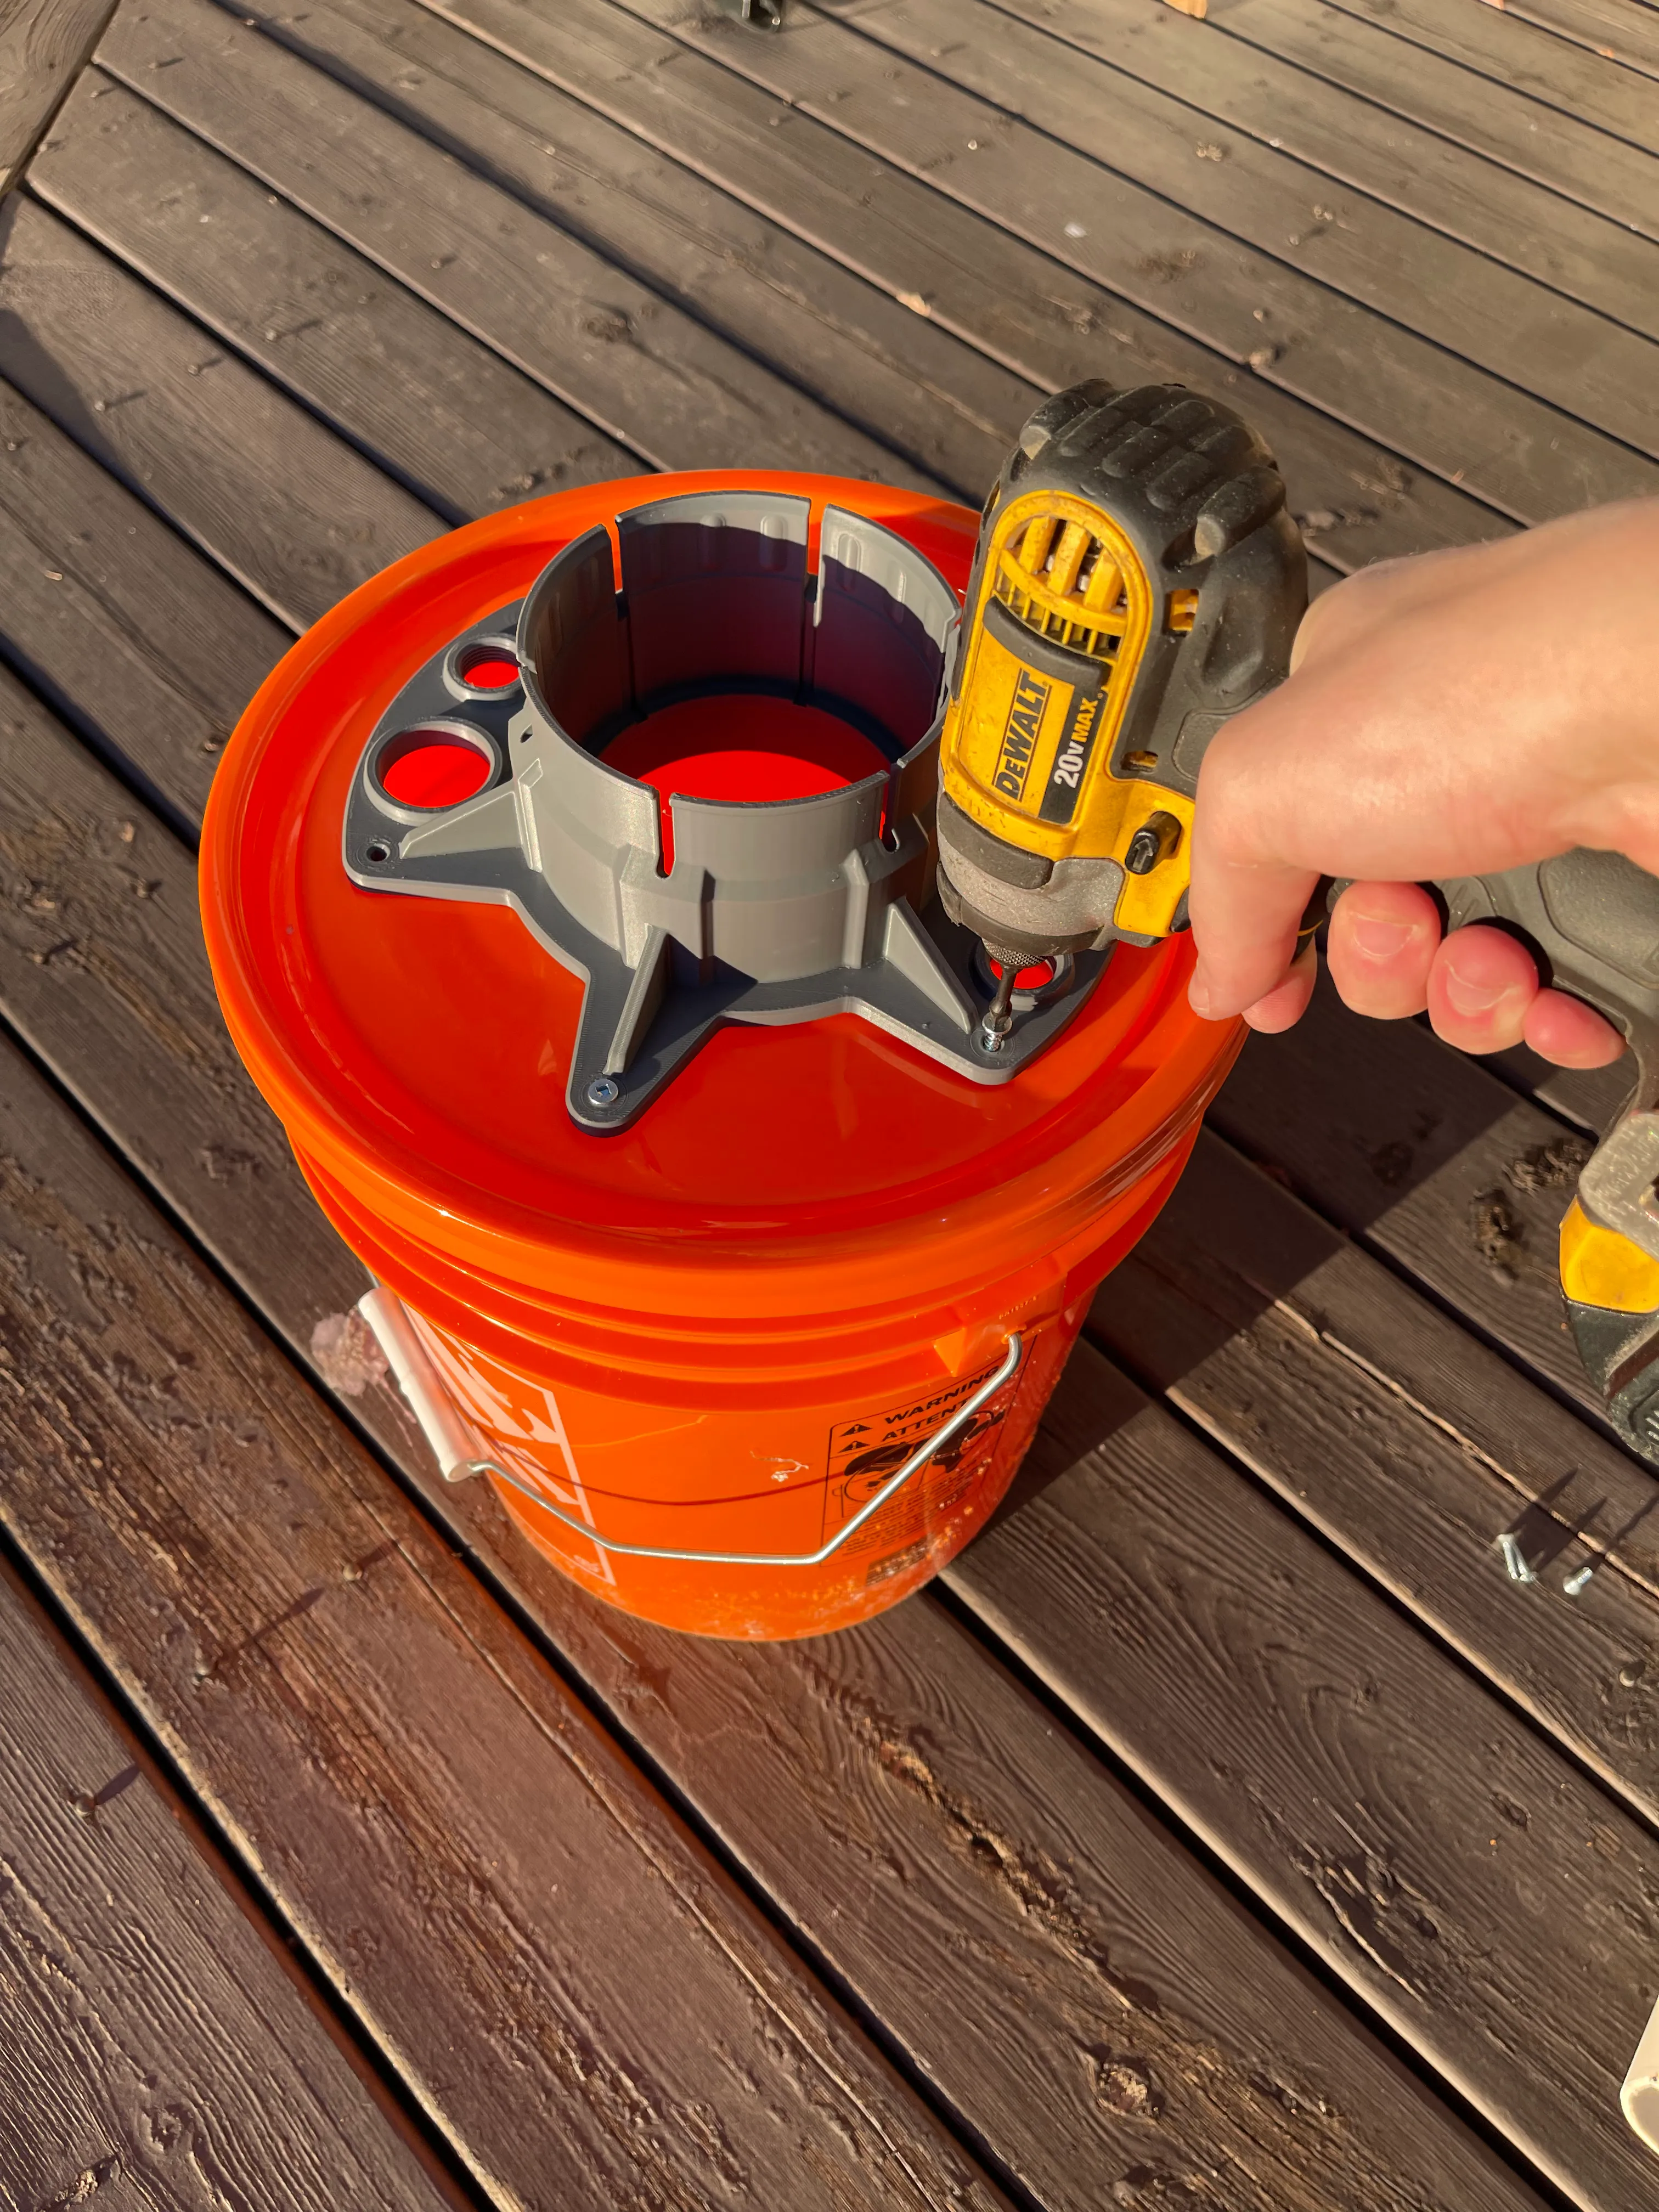
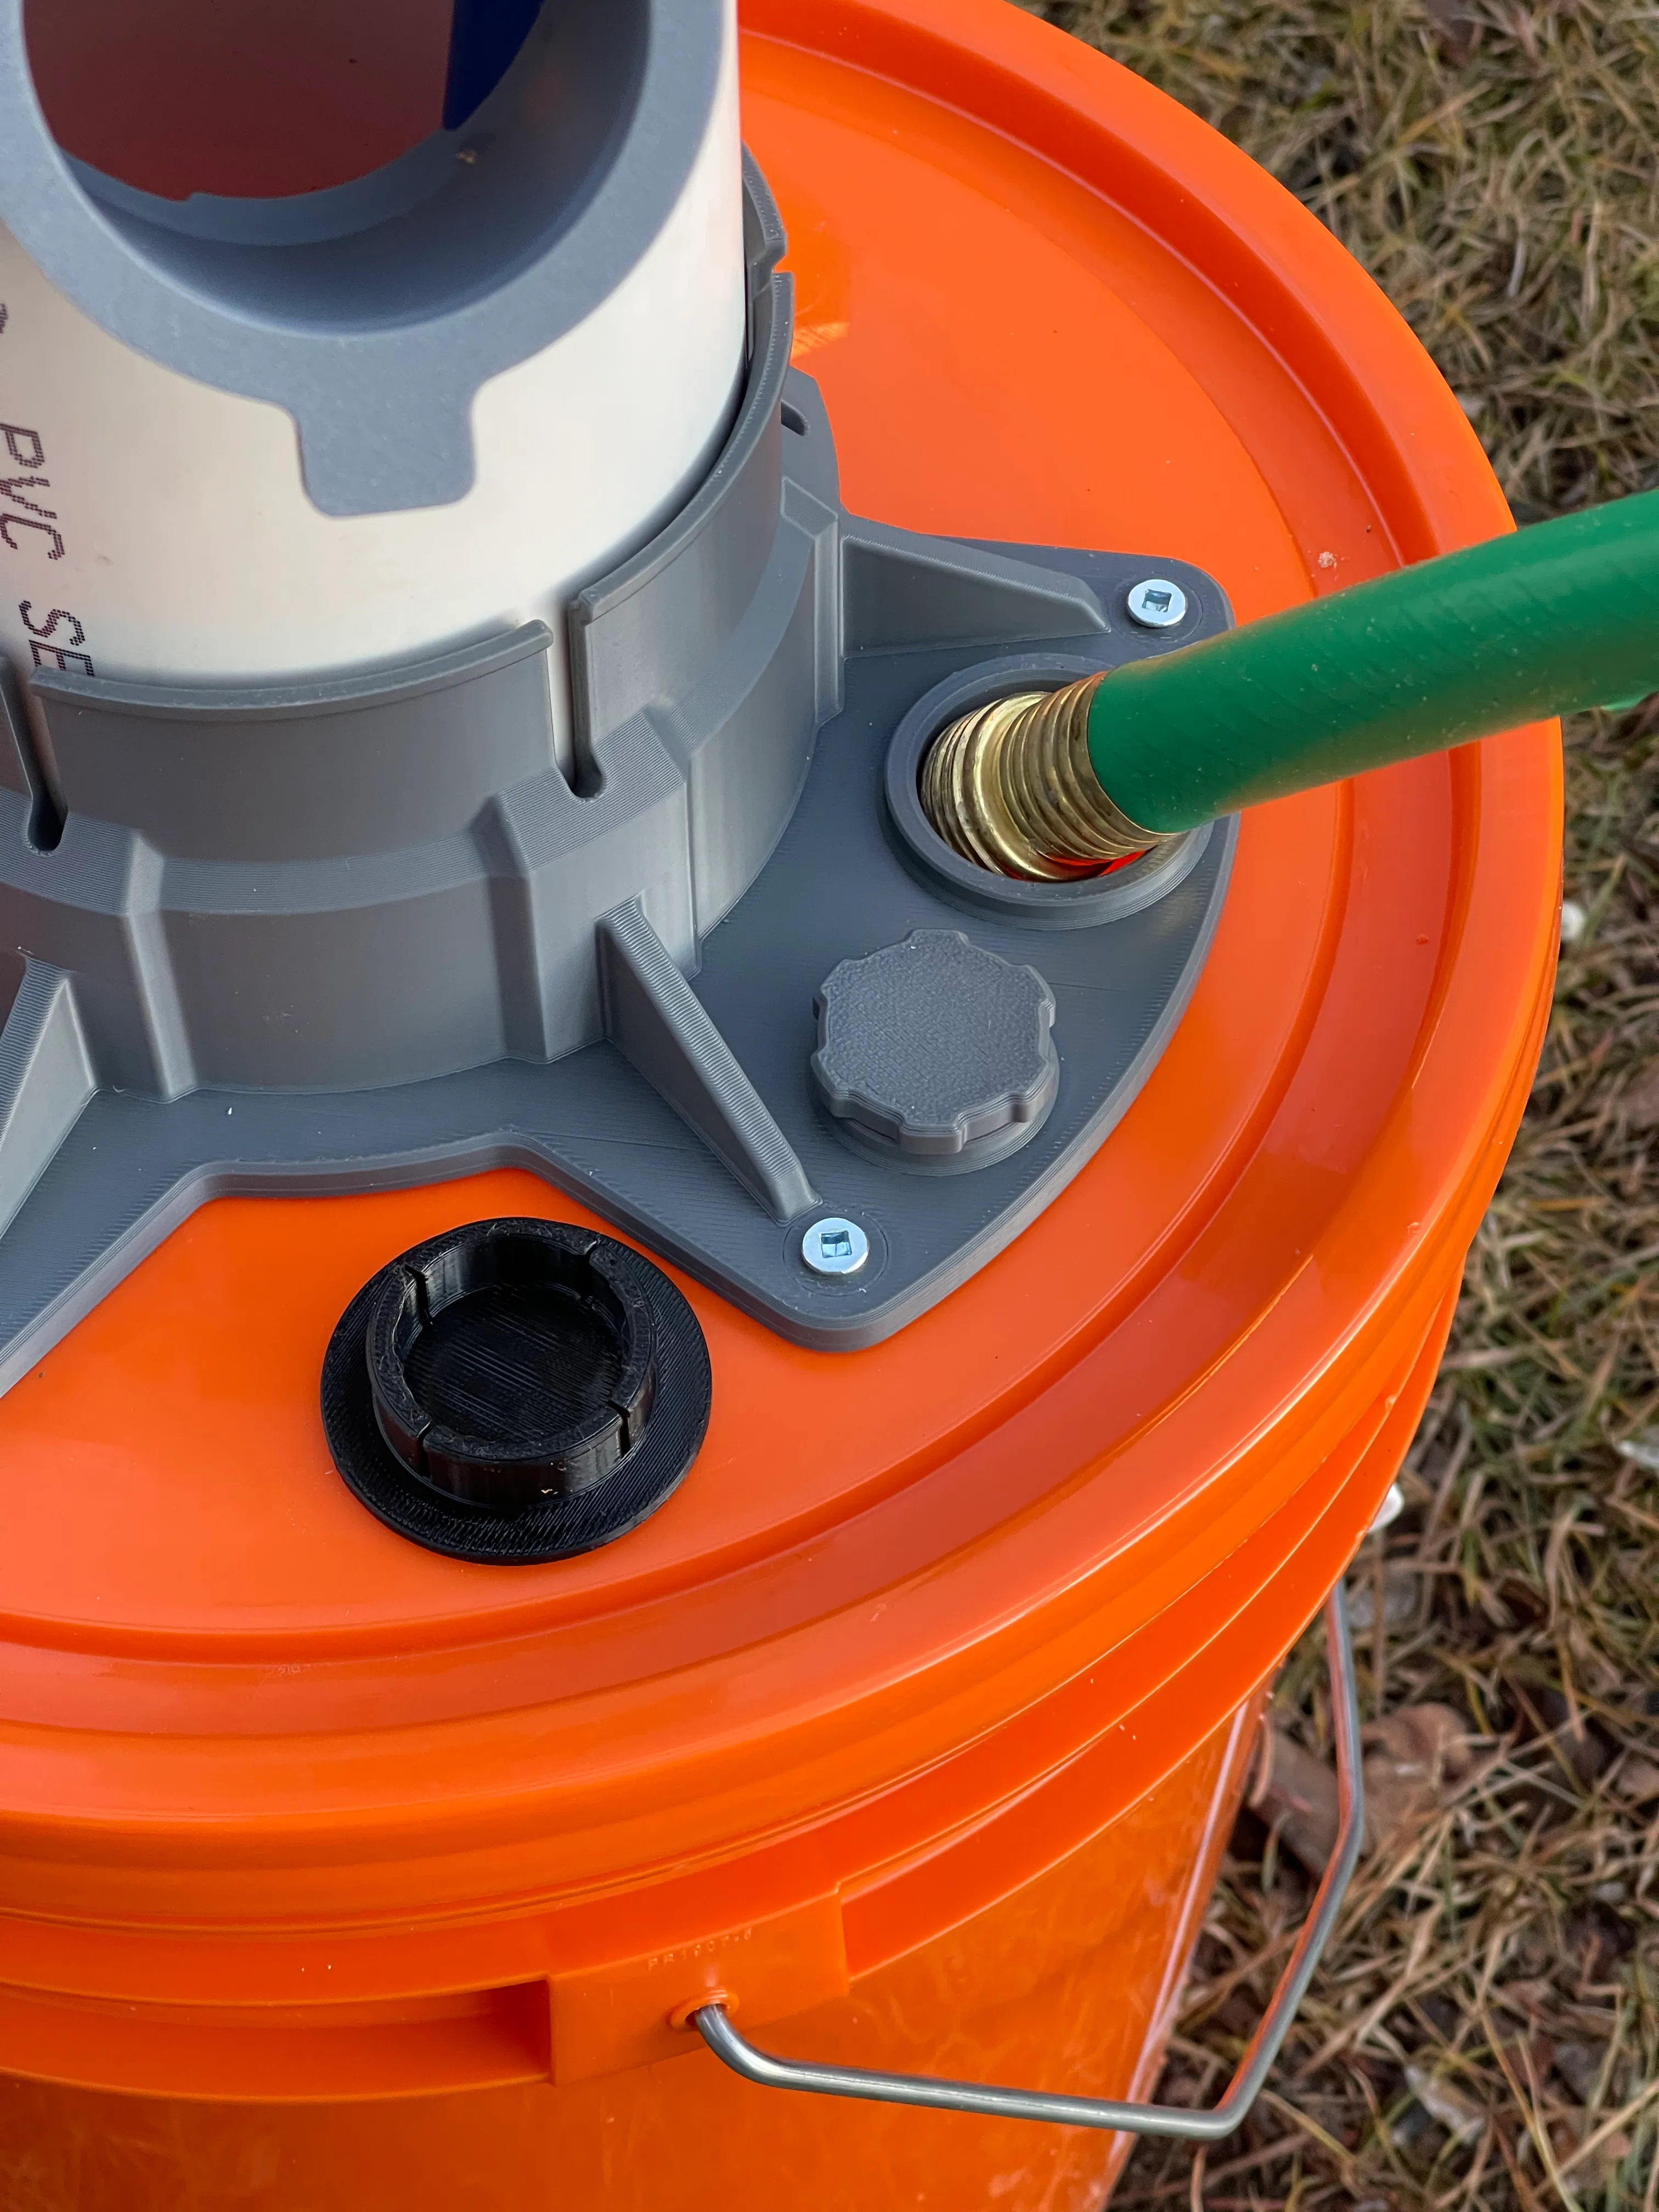
Attaching the HydroSnap Base
- Place the pipe in the center of the reservoir lid and trace its outline.
- Drill a pilot hole and carefully cut out this circle with a jigsaw.
- Remove all of the plugs from the HydroSnap base and place it into the hole in the lid. Trace the inside of the cable and fill holes.
- With a holesaw or jigsaw, cut the 4 holes.
- Deburr the holes, and screw the base to the reservoir lid.
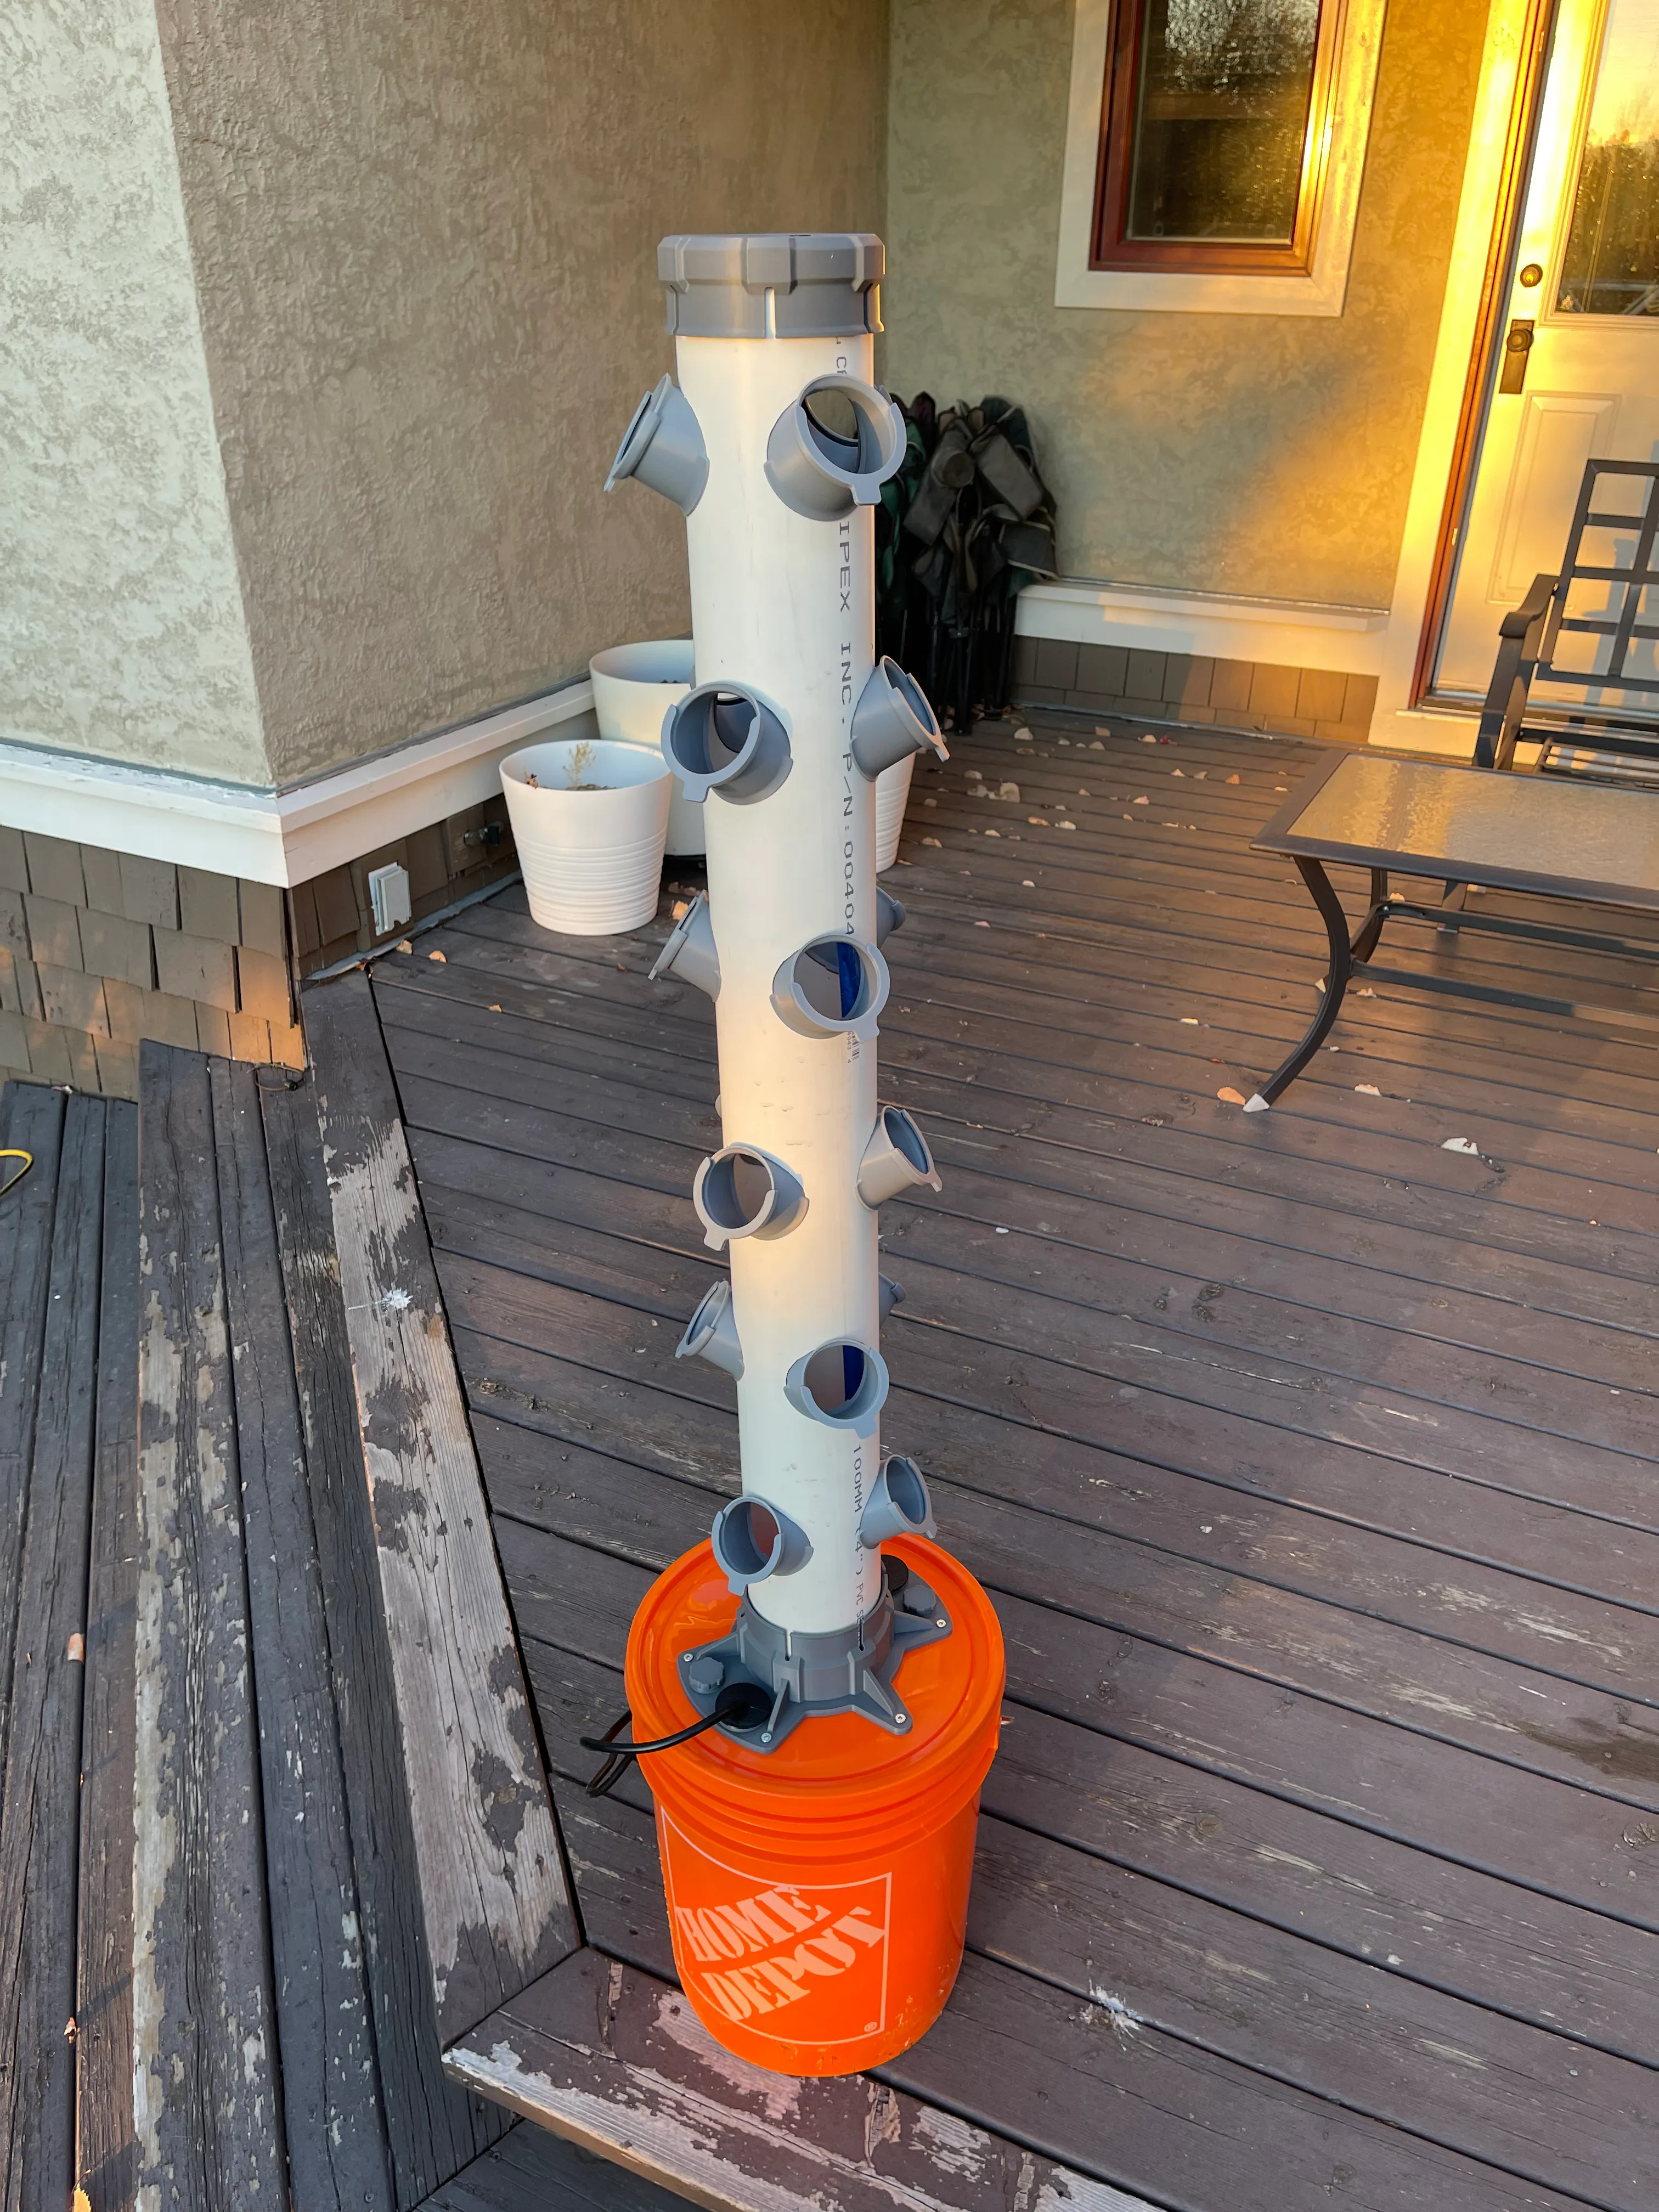
Final Assembly
- Connect the hose to your pump and place it in the bucket, passing the hose through the main opening in the base, and the power cord through one of the larger side holes.
- Snap the bucket lid onto the bucket and reinstall the threaded plugs, fill cap, and cord grip into HydroSnap base.
- Feed the hose through the bottom of the pipe and Insert the pipe into the base.
- Cut the hose to length, connect it to the hose barb on the HydroSnap cap and slide the cap onto the end of the pipe.
- Install HydroSnap inserts into pipe — Remove the locking clips, place the top of the inserts into the hole first, then push on the bottom to snap them in place.
- Load plants / net cups into inserts and reinstall locking clips.
Ready to Grow!
Time to fill up the reservoir with nutrient solution, fire up the pump and start growing! The towers don’t need a ton of water flow, so adjust the pump as necessary.
A few dribbles of water coming out of the insert is normal. This usually isn’t a problem, the HydroSnap base is designed with small channels to direct this water back into the reservoir. If you had some big oopsies while drilling, and it’s more of a gusher than a drip, feel free to use some caulk of your choice on the pipe/insert connection.
Share Some Pics
Now that you’re growing some plants, I’d love to see how your build went, and how lucious your new tower garden is! Tag me in your pics on social media @mfgnerd. If you have any questions about the HydroSnap towers, the installation process, or just wanna chat, give me a shout.
The full HydroSnap Tower kit is available for purchase on my Shop.